NFC Anticollision, SELECT, UID, and SAK
Follow the NFC Type A activation sequence with POOM to identify and select a tag, then interpret its UID and SAK.
In the previous lab, we answered the first NFC question:
Is there an NFC tag here?
REQA → ATQANow we go one step further. We already know a tag is present. The next question is:
Which tag is it, and how do I select it?
This is where the next part of the Type A activation flow appears:
Anticollision → UID → SELECT → SAKGoal
Understand:
- what Anticollision is;
- where the
UIDcomes from; - how
SELECTworks; - what
SAKmeans; - why some UIDs need multiple Cascade Levels.
Why does Anticollision exist?
Imagine placing more than one NFC tag near the reader. Several tags could try to respond at the same time.
POOM needs a way to resolve that situation and end up selecting one specific tag. That process is called:
AnticollisionFor this lab, think of it as:
"There may be one or more tags here. Let's discover which one I am going to talk to."
Even when you place only one tag on POOM, this process is still part of ISO/IEC 14443 Type A activation.
What is the UID?
During Anticollision, the tag sends a value called the:
UIDUID means:
Unique IdentifierFor these labs, you can think of it as:
the identifier that participates in selecting the tag.
For example:
A3 13 54 94could be the UID of a tag.
Why does the UID matter?
Here is the interesting security lesson: some simple or older access systems work roughly like this:
Tag → UID → is it authorized? → open doorThe user taps a card, the reader obtains the UID, and the system compares it against a list of allowed identifiers.
That can work, but it has a weakness:
the UID is not a password.
If a system trusts only that number, presenting the same identifier may be enough to fool a poorly designed system. More robust systems add authentication, keys, and protected data.
The important idea is:
Identifying a tag is not the same as authenticating it.
What are Cascade Levels?
Not all UIDs have the same length. Because of that, selection can require multiple stages:
4 bytes  → CL1
7 bytes  → CL1 + CL2
10 bytes → CL1 + CL2 + CL3
The Cascade Level command values are:
| Level | Value |
|---|---|
| Cascade Level 1 | 0x93 |
| Cascade Level 2 | 0x95 |
| Cascade Level 3 | 0x97 |
In this example we use a 4-byte UID, so the process finishes at:
CL1What are SELECT and SAK?
After POOM receives the needed information during Anticollision, it can send:
SELECTThe idea is:
"I want to select this specific tag."
The tag responds with:
SAKSAK means:
Select AcknowledgeFor this lab, read it as:
"This selection step was accepted."
SAK also helps POOM determine whether the activation process needs to continue to another Cascade Level.
Let's go to the lab
- On POOM, open THE BEAST from the main menu, then select CLI.
- Place POOM on top of an NFC Type A tag. The NFC antenna is on the back of POOM, so the tag should sit underneath the device, close to the back side.
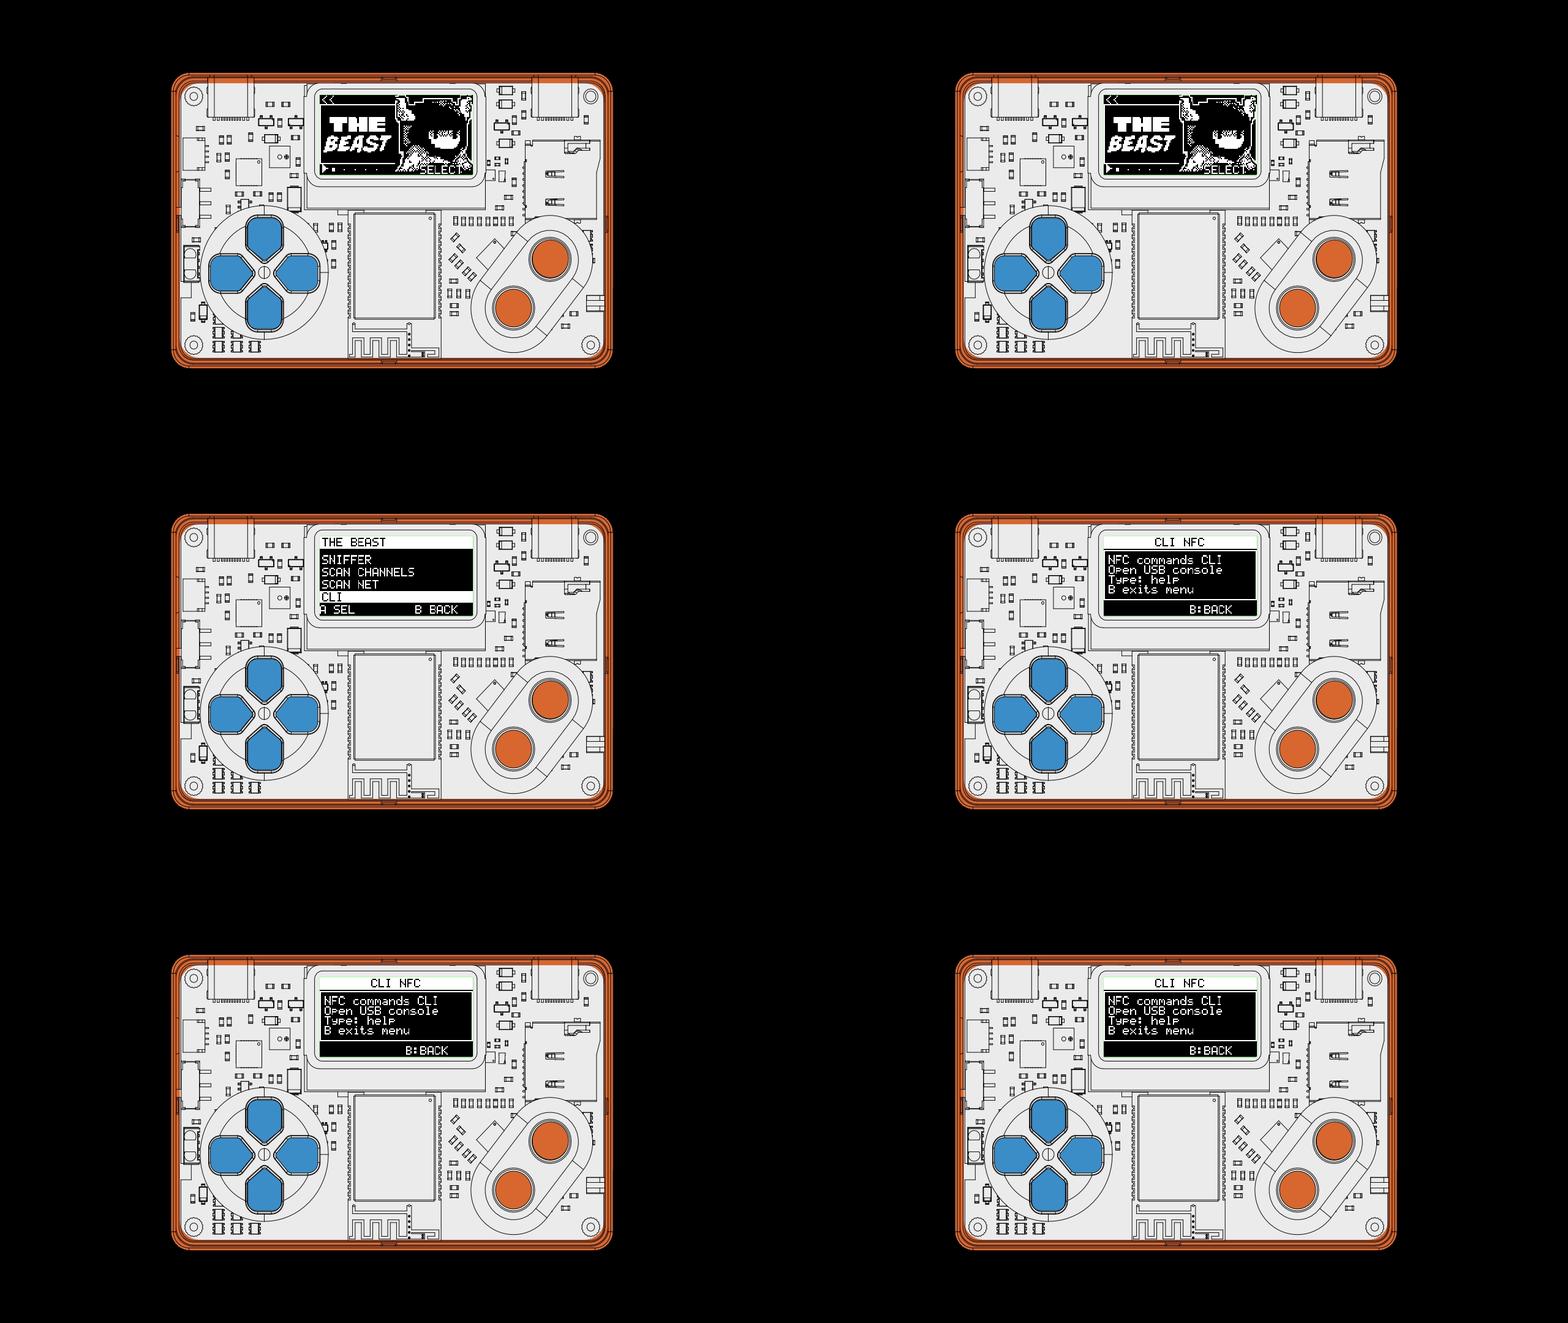
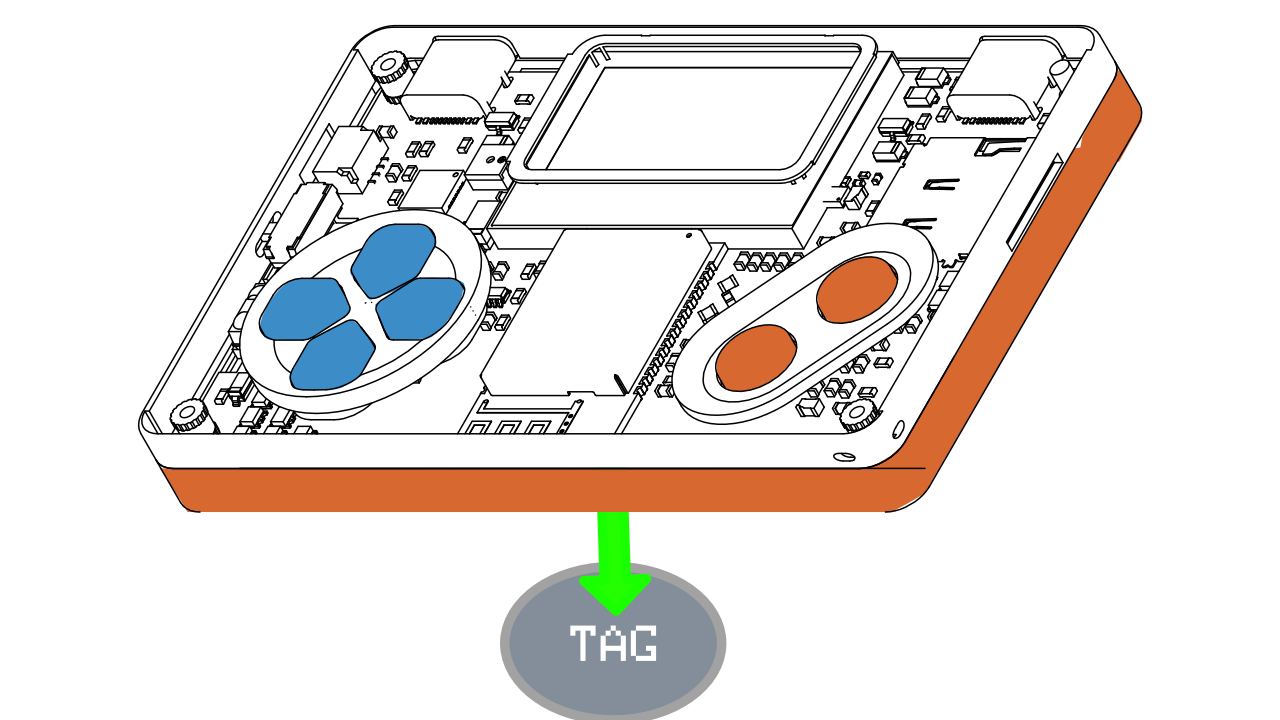
Use the embedded NFC CLI below to connect to POOM, then run the sequence in order.
Start NFC:
nfc-core-startSelect Type A:
nfc-tech-set-aConnect to the tag and let POOM run the activation sequence:
nfc-card-connectThe main sequence is:
nfc-core-start
nfc-tech-set-a
nfc-card-connect
After that, you can save the current tag profile and list saved profiles:
nfc-card-save-current tag_a_1
nfc-profiles-list
Real example
You may see output like this:
poom> nfc-card-connect
  [TX] REQA (26)
  [RX] ATQA: 04 00
  [TX] 93 20
  [RX] A3 13 54 94 70
  [TX] 93 70 A3 13 54 94 70
  [RX] 08
  ISO/IEC 14443-A card detected.
Now let's read it step by step.
Step 1 - REQA and ATQA
These two lines are familiar from the previous lab:
[TX] REQA (26)
[RX] ATQA: 04 00
They mean:
REQA → "Is there a tag?"

ATQA → "Yes, I am here."
At this point, we only have detection.
Step 2 - Anticollision begins
POOM transmits:
[TX] 93 20We can split it like this:
93 2093 indicates:
Cascade Level 1and 20 corresponds to:
NVB = Number of Valid BitsFor this lab, interpret:
93 20as:
"Begin Anticollision in CL1."
Step 3 - The UID appears
The tag responds:
[RX] A3 13 54 94 70Split it like this:
A3 13 54 94 | 70That gives us:
UID = A3 13 54 94
BCC = 70
BCC means:
Block Check CharacterIt is a block check value. In this example:
A3 XOR 13 XOR 54 XOR 94 = 70So:
UID = A3 13 54 94and:
70is not part of the UID.
Step 4 - SELECT
POOM transmits:
[TX] 93 70 A3 13 54 94 70Read it like this:
93 | 70 | A3 13 54 94 | 70
CL1  NVB       UID       BCC
In plain language:
"I want to select the tag A3 13 54 94."
Step 5 - SAK
The tag responds:
[RX] 08That means:
SAK = 0x08For this lab, interpret it as:
"The selection was accepted."
In this example, the UID is complete in:
CL1So the UID is:
UID = A3 13 54 94Communication summary
| Part | Meaning |
|---|---|
REQA | Is there a tag? |
ATQA | Yes, I am here. |
93 20 | Begin Anticollision in CL1. |
A3 13 54 94 70 | UID + BCC. |
93 70 ... | SELECT. |
08 | SAK. |
In the previous lab, we reached:
REQA → ATQANow we reach:
REQA → ATQA → Anticollision → UID → SELECT → SAKWhat you should learn
By the end of this lab, you should be able to look at:
[TX] 93 20
[RX] A3 13 54 94 70
[TX] 93 70 A3 13 54 94 70
[RX] 08
and understand:
93 20
→ begins Anticollision

A3 13 54 94 70
→ UID + BCC

93 70 ...
→ SELECT

08
→ SAK
The most important idea is:
Detecting a tag is not the same as selecting it, and selecting a tag is not the same as authenticating it.
With this lab, we now understand how POOM moves from:
"there is a tag"to:
"this is the tag I am going to select"