Getting Started & Flashing
Learn POOM's physical controls, enter Bootloader mode, and update POOM firmware safely from Chrome or Edge.
POOM is designed as a platform that will continue to grow. That is why an important part of these labs is learning not only how to use its applications, but also how to update its firmware.
POOM currently supports updates through DFU (Device Firmware Update). Later, we will explore this process in greater detail and look at different ways to perform an update.
Meet Your POOM
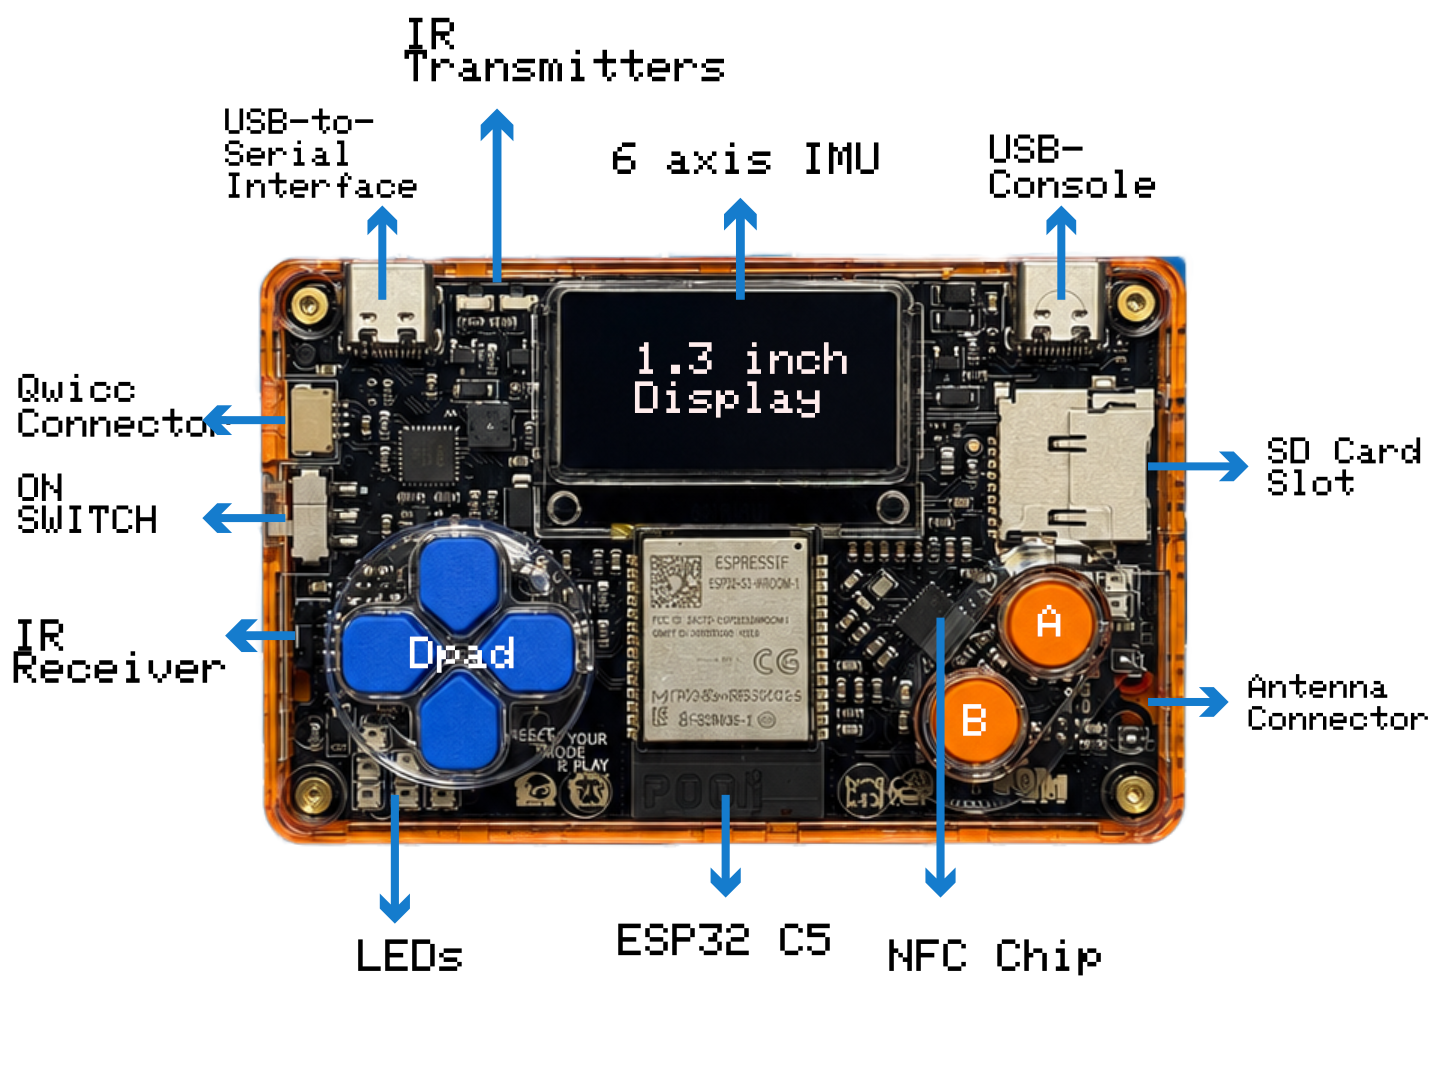
Before starting the labs, take a moment to become familiar with the physical parts of POOM. This component map will help you recognize its screen, controls, ports, storage, and onboard hardware when the instructions ask you to use them.
Why is this important?
POOM will not have a single, static firmware version. Many of its applications will need new releases, improvements, and fixes. So far, we have focused mainly on developing the most curious and experimental features for each avatar, but each one will progressively receive maintenance and new capabilities.
For this reason, one of the first things you should learn is how to place POOM in programming or Bootloader mode.
Enter Bootloader Mode
When working with Arduino or PlatformIO, POOM must enter programming mode before certain firmware can be uploaded.
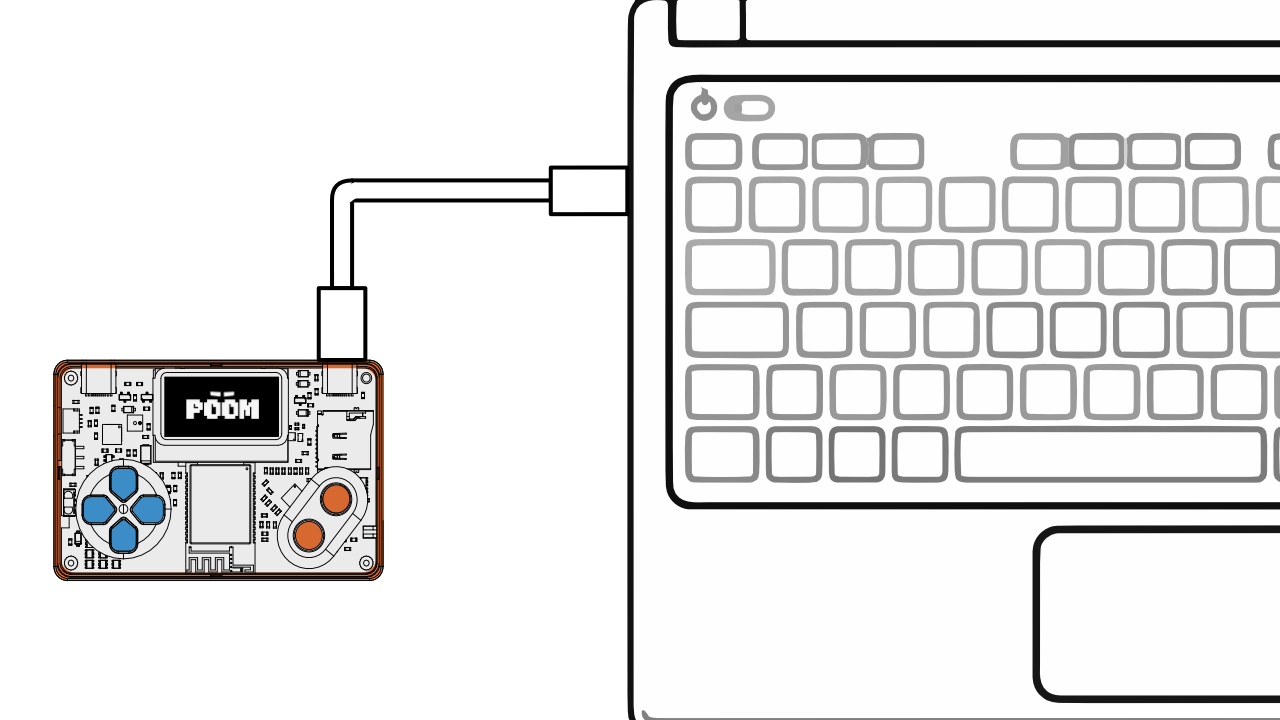
Before you begin, connect POOM to your computer using its USB data cable. It is important to use the USB port on the right side of POOM, because this is the port used for programming and firmware updates.
The procedure is simple:
- Connect the USB data cable to the right-side USB port on POOM and to your computer.
- Turn POOM off.
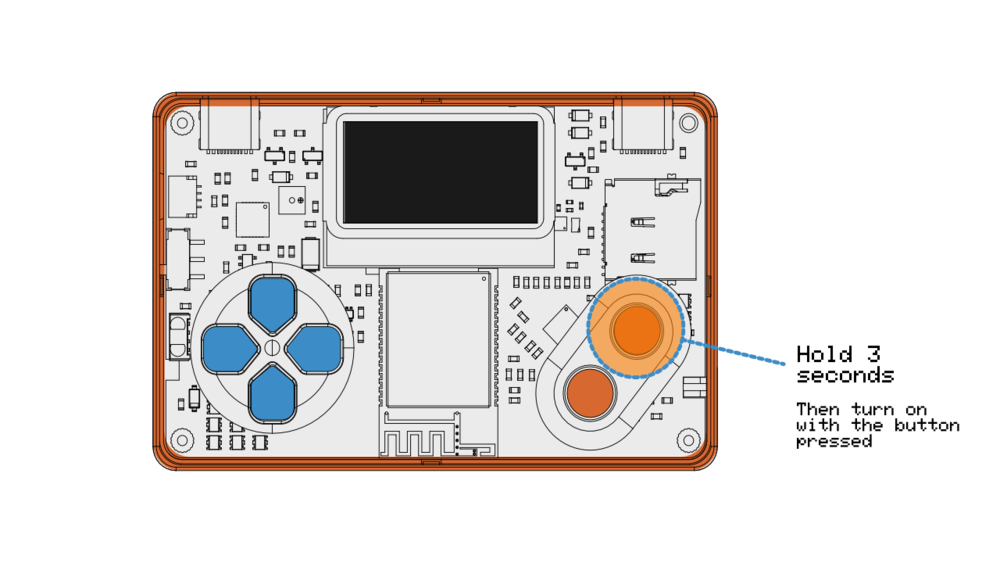
- Press and hold button A, the button shown in the following image.
- Without releasing button A, turn POOM on.
- POOM will start in Bootloader mode.
In this state, the device is ready to receive new firmware. Depending on the tool being used, you may also see this process described as firmware download mode or DFU mode.
Update from the Web
Once POOM is connected with the USB data cable and is in Bootloader mode, you can use the POOM Web tool to perform the update.
The advantage is that this tool runs directly in the browser and works on Windows, macOS, and Linux. More of POOM's programming and maintenance tools will be integrated around this interface over time.
Check the version before updating
Before updating, you can check which firmware version is installed on your unit. On POOM, open:
SETTINGS → FW INFO
There you will find information about the currently installed version.
Finish and verify the update
After starting the Web Flash process, wait for the firmware upload to finish successfully. Once it is complete, turn POOM off and back on to exit Bootloader mode and start normally with the new firmware.
After restarting, return to:
SETTINGS → FW INFO
and confirm that POOM is now running the new version.
The goal is for updating POOM to become a natural part of using the platform: new labs, new applications, and new capabilities can all reach the same hardware through firmware updates.